 |
||
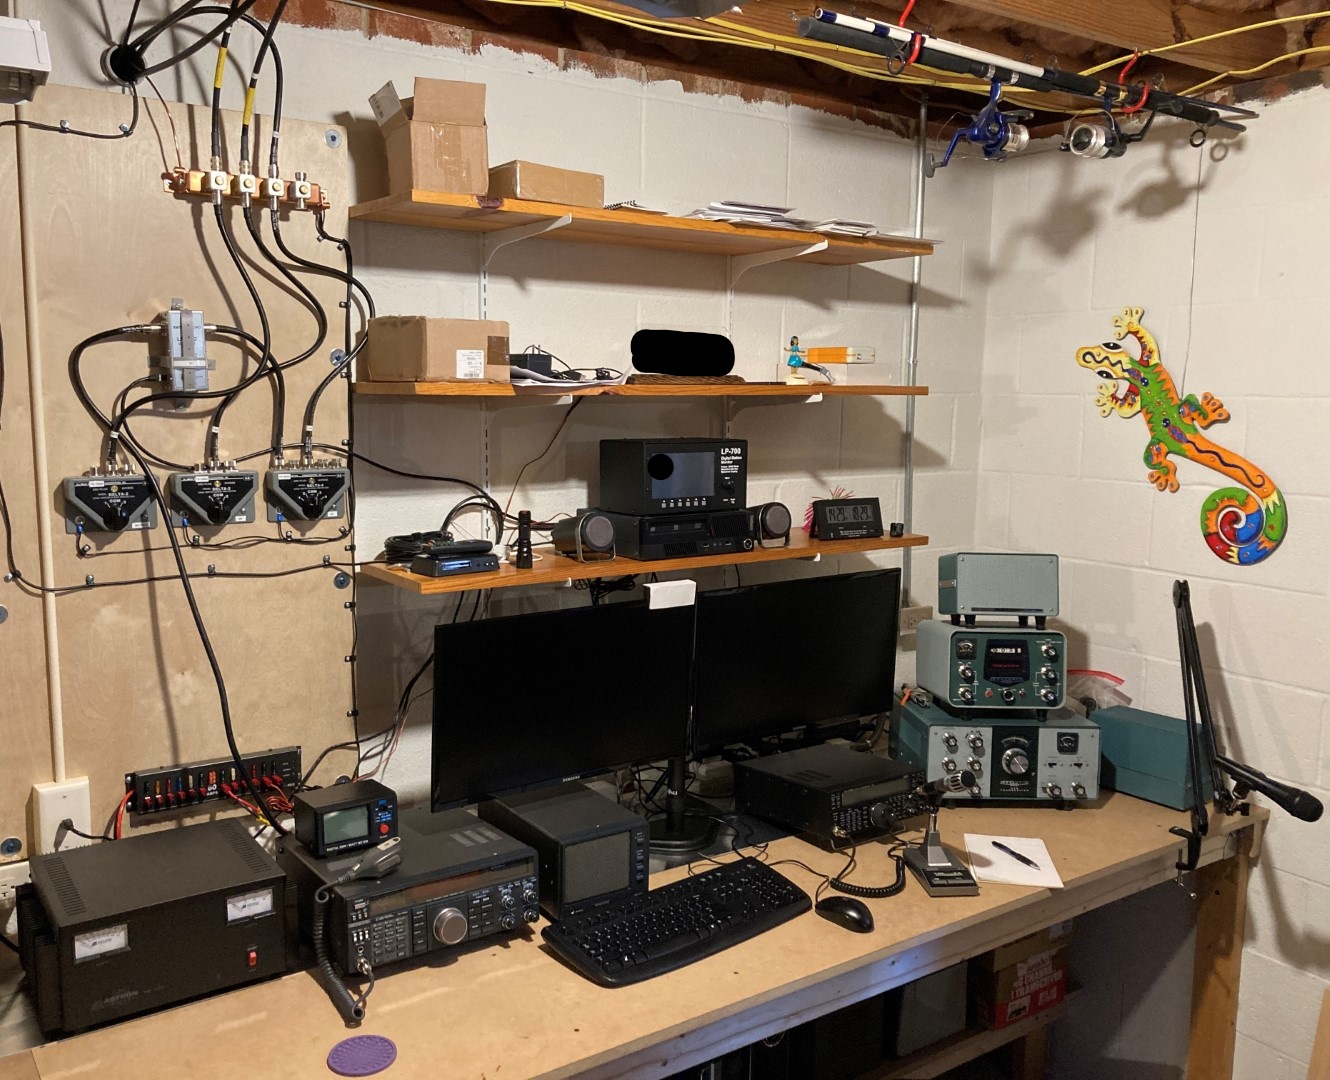
| Sorry about the black blobs, but OPSEC. |
No, that kind of hooking up. Y’all got some dirty minds.
I mean hooking up the ham radios. I didn’t do all that antenna work for nothing.
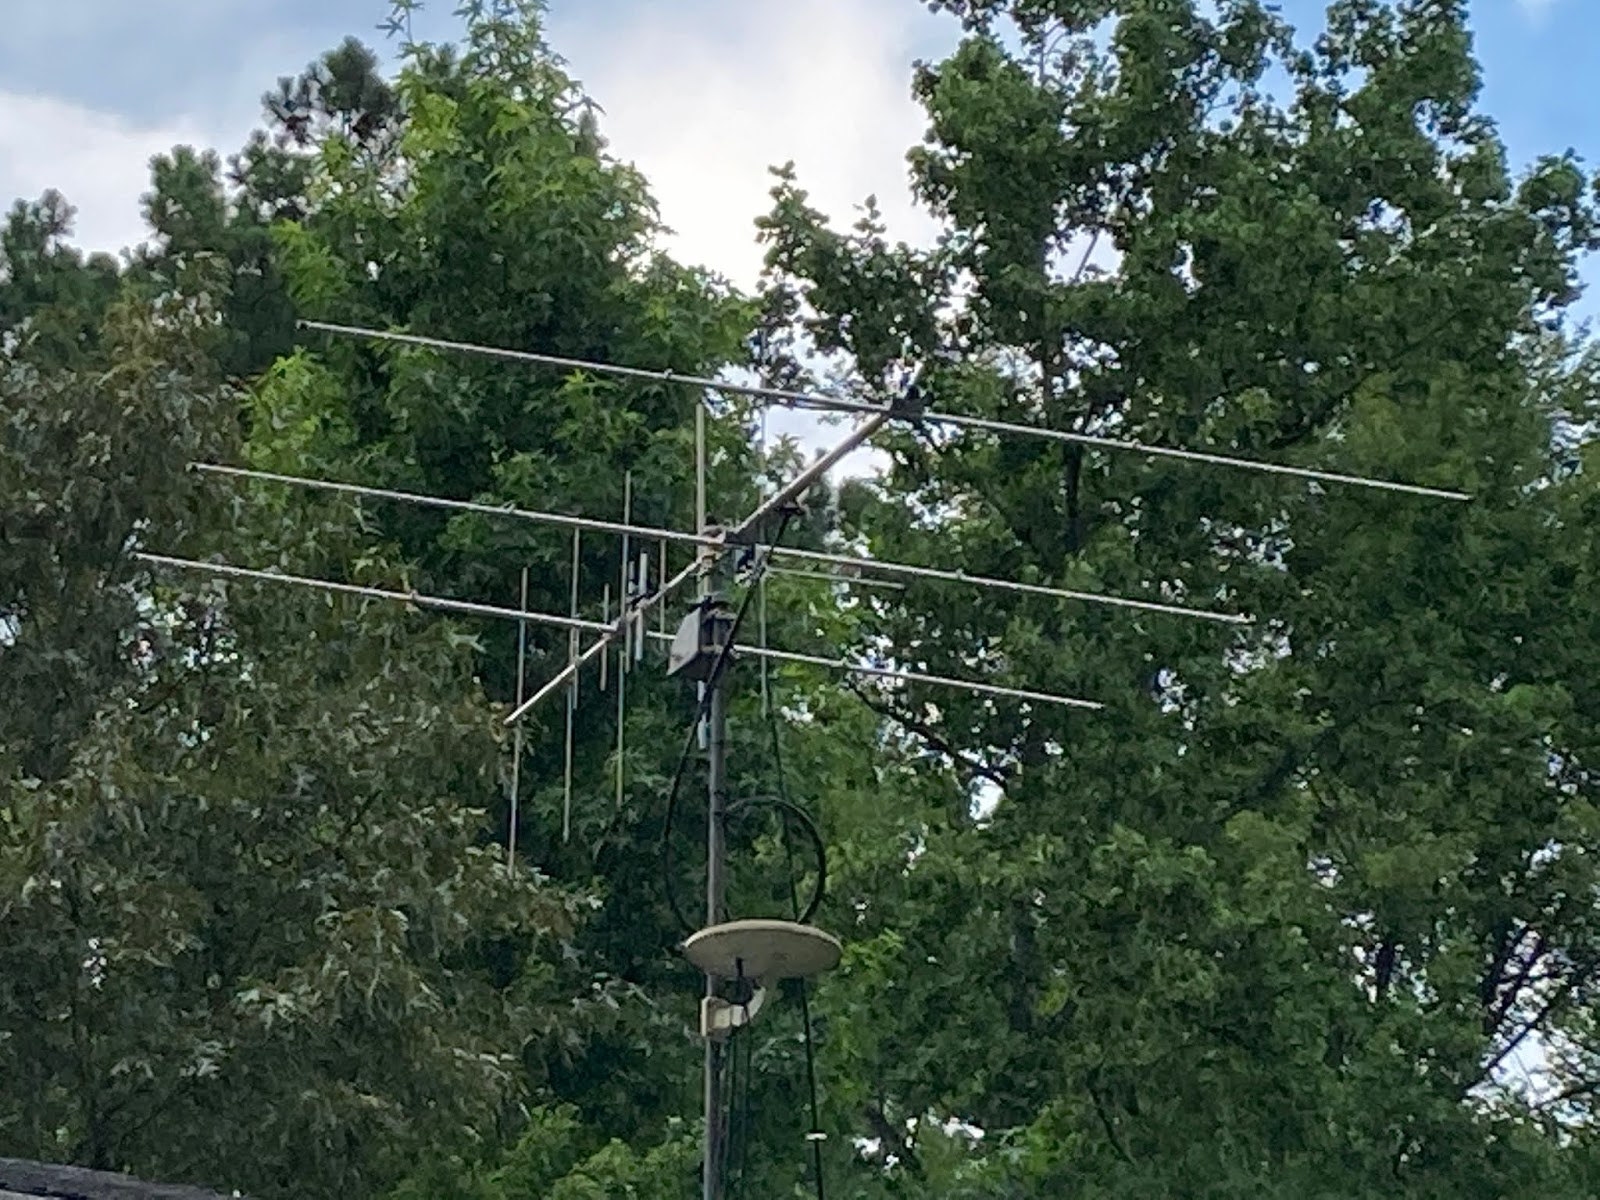
While not quite feature complete, this is my ham shack, such as it is. It’s easy to findsome very well-done (and probably very expensive) places to play ham radio, but this will do for me. It’s tucked into a corner of the basement, conveniently close to the antennas and their penetration point into the house.
It isn’t pretty, but it’s functional and has the plus of being inexpensive, thus leaving funds available for other things.
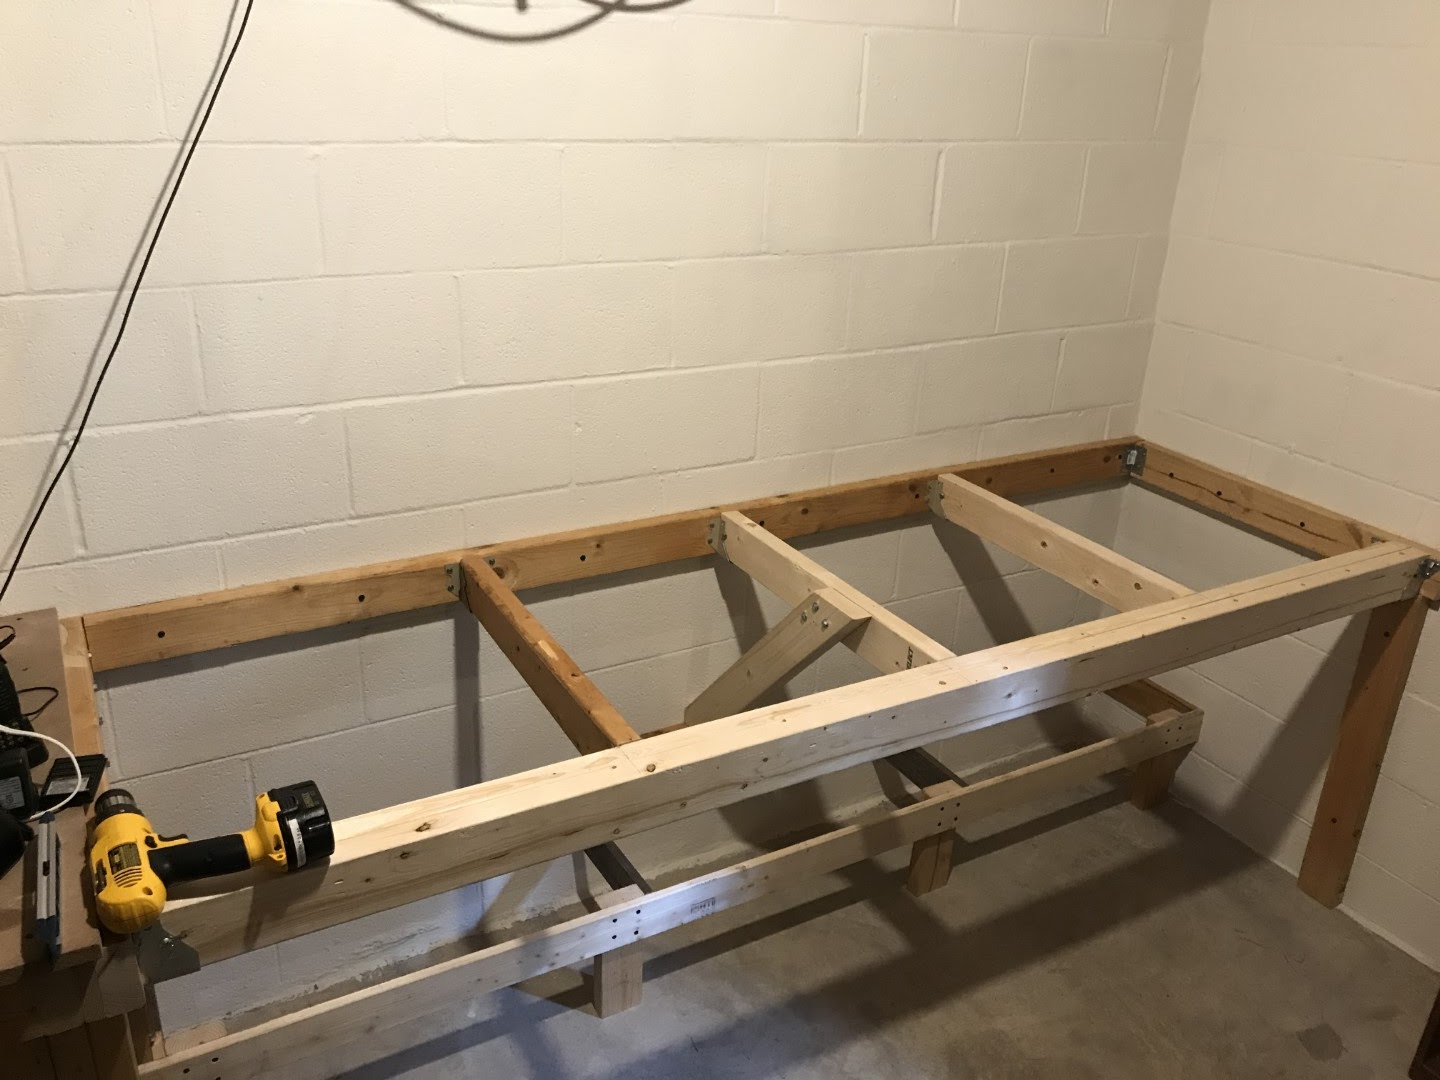 |
| I’ve been framed. |
I started this off by framing up a little lighter version of the rest of the benches in the basement. (A standing joke from a friend is “Good lord! What are you planning on putting on those things?” The answer is “Anything I want.”)
The diagonal center brace was added after I found a 3/16″ deflection in the laminated 2×4 front with my full weight on it. Now, it has no deflection.
I don’t like my benches to move.
 |
| Bench with top installed. Bonus Hate Chicken drink cup. |
Topping this with 3/4″ MDF, it makes a really stable bench that I can use for something else if I ever decide to move the station.
Under the bench, you can just see what happens with the piece that is ripped of the full sheet of MDF. I have a shelf like this under every bench. This one holds some of my miscellaneous radio gear that we may talk about at a future date.
I ran 2 20 amp circuits from a subpanel. That’s more than enough for now, and should be enough if I decide to add a small (600 watts-ish) amp at some point in the future. I ran the wiring down the walls in EMT conduit and installed a Leviton plug strip across the back of the bench for non-radio items, like the computer.
A 2’x4′ plywood board was mounted to provide a mounting spot for antenna and ground cables, antenna switches and the single-point ground system. 2 1’x4′ sheets of aluminum were drilled for screws which allow me to use ground straps to ground equipment. The sheets are tied together with a ground strap and grounded to the single-point system.
13.8 vdc power is supplied by an Astron RS-70M power supply and is distributed via a West Mountain Radio RIGrunner 8012 Anderson Powerpole power strip. The Powerpoles are something I picked up on from the ARES folks. Very slick. If you decide to get into them, do yourself a favor and buy a proper crimper and the small tool to insert the connectors into their housings.
The radios are, left to right, a Kenwood TS-790A, a Kenwood TS-590S and a Heathkit HW-101 stack including speaker and SWR meter/station clock. As a teenager, the Heathkit was the radio of my dreams, until my dreams turned to cars, stereos and girls.
There is also a Telepost LP-700 Digital Station Monitor for HF and 6 meter use and an MFJ-849 watt meter/SWR combo for VHF/UHF work. The computer is from Lenovo with 2 Samsung 24″ monitors.
Not pictured is the N3FJP software suite that I run to keep my logs. Good stuff-simple, inexpensive and notably free from bugs.
The station went live on Field Day, and so far I’ve made contacts in slightly over half the US States and 25 foreign countries. I’m pretty pleased so far. I plan on continuing to optimize the DX Commander antenna (that’s a future post) and the settings on the radios to get the most I can get out of what I have.
I still need to figure out some task lighting. As you can see, I have plenty of overhead light. However, it’s a bit much when running a radio. I tried a couple of LED desk lights we had sitting around, but man, the RFI from them was murderous. I have an old florescent drafting light from my Dad, and if that doesn’t work I may try and find an old Luxo or similar task light.
73