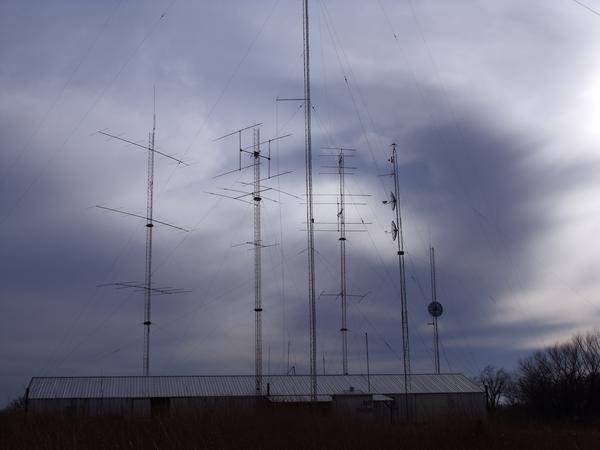
The weather is getting back to spring, and it’s time to launch into some spring projects. One of many is the installation of a Cushcraft 6m/2m/70cm beam antenna. Now, if I were an real, old-fashioned ham, I’d build it. And I’d have nearly as much money in the parts and specialty tools as I’d have in just buying it. When I consider the hassle/swearing factor, plus trying to dial that sucker in, I’ll just put up with being called an “equipment operator” and buy the antenna.
First however, you have plan the installation. My “ham shack” (actually, ham shack in waiting), which is actually nothing more than one end of 40-something feet of L-shaped workbench, resides in the basement of our house, which is a stereotypical brick ranch house. Fortunately, it’s located on the end of the house where I plan on putting up the mast, which makes for nice short cable runs. This is important to minimize transmission and reception loss in the antenna cables themselves. Even using LMR-400 cable, which is a good low-loss cable, I want to keep my runs as short as possible.
The antenna itself, per the manual, can be installed on common thin wall antenna mast. Given that I need 20′ of mast, that seems to be a bit on the light side to me, especially since it isn’t easy to place stabilizers in the middle of the mast. This is due to the distance to the side of the house and lack of adequate structure to tie into. The brick makes for a nice house, but it’s a veneer, not a structural element. The only place I can get to structure is at the peak of the roof.
I’ve decided to use some 1″ galvanized pipe I have had lying around. Originally it was top rail on an old chain-link fence that dated from the early 1970s. Much heavier than what they use for top rail these days, it’s far heavier than antenna mast. It will have one coupling somewhat above the middle of the mast, but that I can’t help. It’s better than the 5 joints I would have with the thin wall mast, which I can only get in 5′ sections.
So, having purchased a Rohn antenna mast bracket to secure the upper end, I made sure I had the appropriate tools, lag screws, drill bits and so on on hand. There’s nothing like being in the middle of a project and needing to make a run to the hardware store. Then it’s up the ladder to mount the bracket.
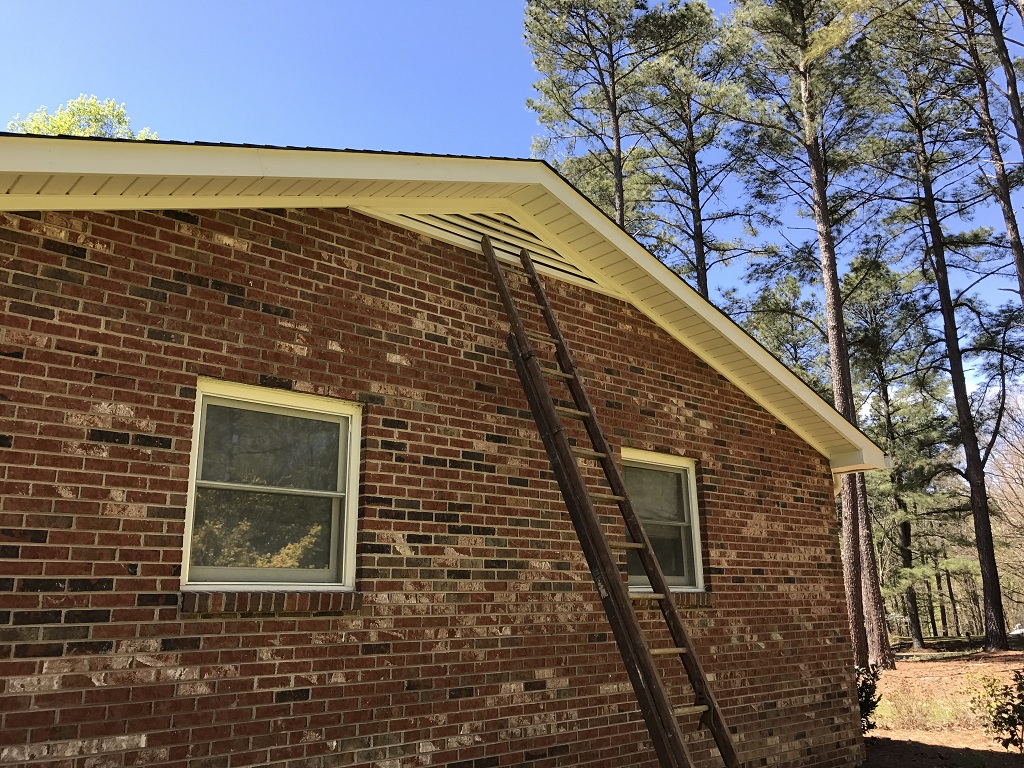
This turned out to be far easier than I expected it to be. Son was available to assist by spotting in case his old man decided to increase the family net worth by pitching head first off the ladder, but all went relatively well. The only unexpected thing was that I didn’t hit as much solid wood on the right side as I expected, and I hit more on the left. When I had scoped this out in the attic, it appeared that there was a gap between the last rafter and the fascia board, so I had prepared for that by getting a couple of 6″ lag screws. I also took a couple of 2″ screws with me, just in case I hit fascia backed by an unseen rafter. So what did I hit? Fascia backed by an unseen rafter on the right and something solid for the length of a 6″ drill bit on the left. So I used one of each.
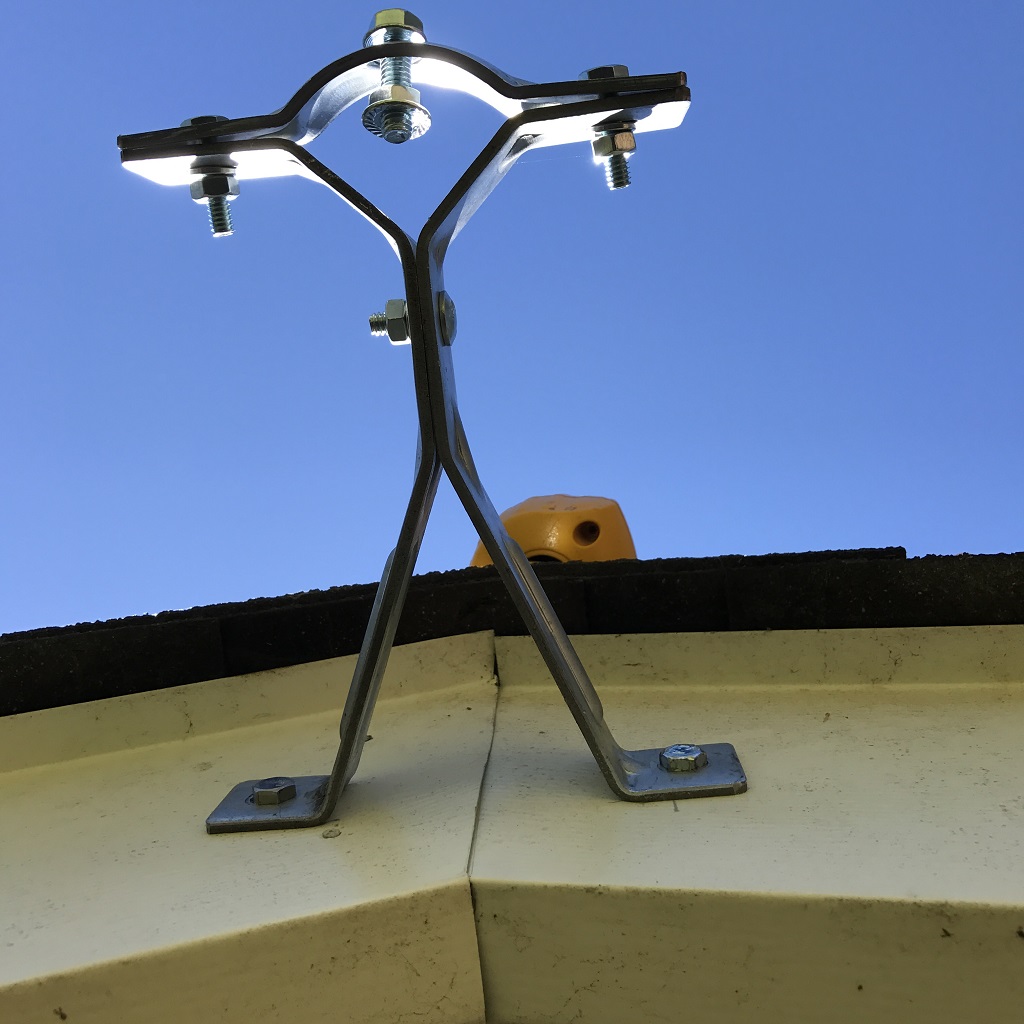
That sucker is up there. The one thing I would like to see is the legs spread wider apart for some extra stability. I may try to find some sort of bracket to the middle of the mast after all, but for now we’re going with what we have.
After this, I dropped a plumb line and marked the approximate center of the mast so we can dig the hole for it to sit in. I don’t think I’ll hit any utilities, but I think I’m going to call the “One Call” folks Monday. I know my cable comes through that area, but right next to the house, and I believe the power does further out. Even though I’m hand digging, I’d hate to find either by accident.
Next up is threading the ends of the ex-top rail. I dig out my Dad’s old pipe vise and his pipe threader and dies. I start looking for the 1″ die and…there is no 1″ die. I would have sworn he had dies from 1/8″ up to 2″, but nope, they stop at 3/4. Bad Language. At least I found a refurbed 1″ die for that antique threader on eBay; theoretically it will be here before the end of next week. What was that I said about having to make a run to the hardware store in the middle of a project?
I can continue by drilling the hole through the wall of the house, but that one is going to take a while, and I would rather have a full day to do it, so I packed up and called it a day. More when I circle around to this next week.