
Recently I’ve posted a couple of times about stocking up in anticipation of quarantine, either self or government imposed. It’s time to start breaking down the bulk packages into more bite-sized portions.
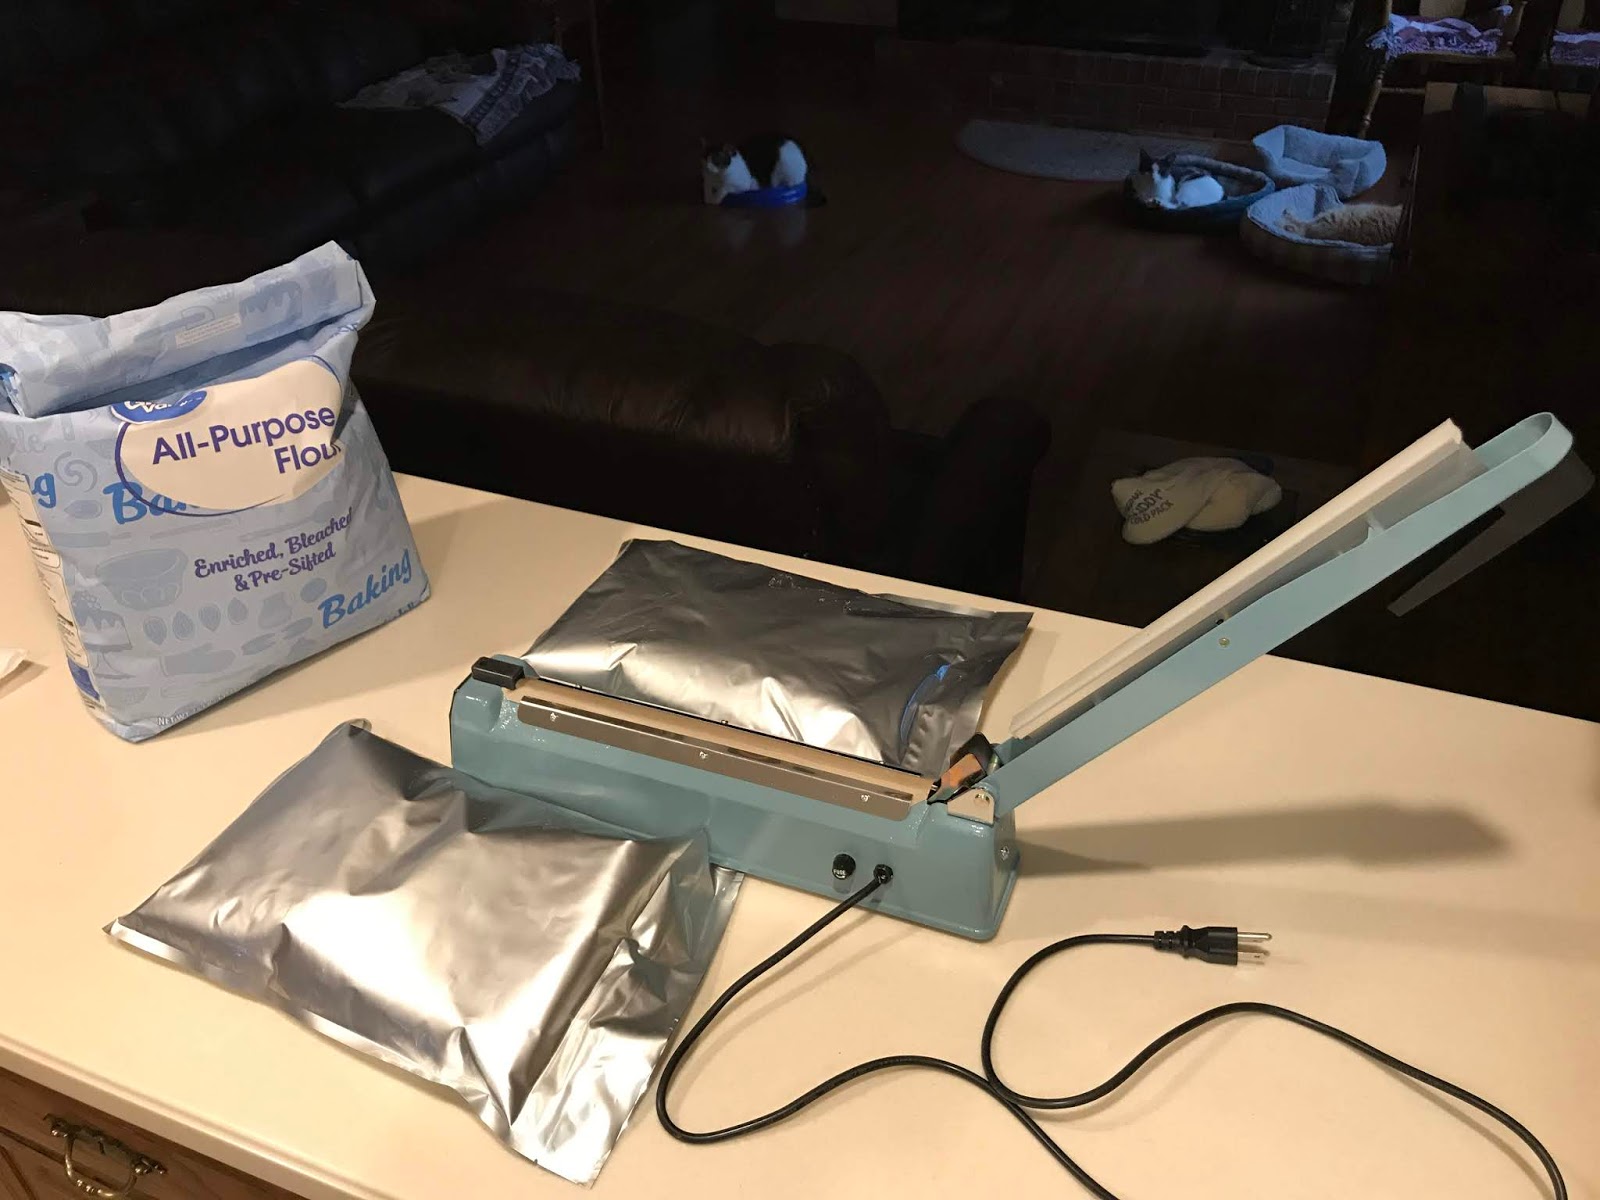
This is something I’ve not done before, so it’s a learning experience. These are the first two mylar bags you see here. They each contain roughly 12 cups of all-purpose flour and weigh in at a bit over 4 pounds each. I should have 6 such bags per 25# bag of flour. With the amount on hand, that will be 18 bags of flour. I came up with that amount based on the amount of flour needed to make a loaf of bread, which, depending on your recipe, is 3-4 cups. If that math doesn’t work out, well, we have nice “air tight” containers for such things on the counter.
You may note the bags are a bit “fluffy”. That was on purpose. I wanted the air so I could press down and see if my seal leaked. Good thing I tested, because it did and I had to reseal. One the first bag it took 2 tries; the second took 3, but I think it actually sealed on the second. It seems I’m not getting a good seal at the corner where my seal meets the factory sealed side. That may be from not enough heat being applied. I keep nicking it up with each bag. I’ll use these bags first since I doubt they’re going to be totally oxygen-free.
The bags themselves are a generic, 3.5 mil mylar bag. Inexpensive when bought by the hundred. Each gallon-sized bag is getting a 500cc oxygen absorber. That size is per the vendor.
The flour was frozen for several days to ensure any vermin present were dead. The cold flour makes the bag sweat, and that may also be an issue with sealing. I’m taking a break right now in order for it to reach room temperature.
The sealer is an impulse sealer, this one in particular. Nice enough, and I like that an additional screen and two heating elements come with it. The downside is that you have no guidance on how hot to set it for a given bag type, so you have to experiment.
After flour, there are rice and beans to pack. But the effort will be worth it if we need it.
The sealing issue may also be the four sticking to the area where the seal is. I've had that issue with some sealers and Mylar bags. …especially the corners as you described.
I don't have a decent solution yet.
I use a vacuum sealer.
How long do you plan to store it all?
How are you marking contents and seal date?
For some applications your method may be more efficient than my vacuum.
I seal the entire 5# bag with my Food Saver and then freeze a couple of weeks to kill any weevils. The bags are clear, that takes care of labeling.
B, I have had issues with the flour, but a dry paper towel and an upward, out of the bag, dusting motion seems to get it off. Does get a bit messy though, but so does baking, so I just clean up and go on.
BobF, I use a Sharpie and write what's in the bag, the date packed and a use by date on the bag, above where I seal. That gets cut off and the bag can be cleaned and reused at a slightly reduced capacity.
BobF, I forgot to mention the use-by dates. You can Google it, but there is no firm wisdom on how long dry goods last when packed this way. (Here's a couple of random ones: http://www.caltexplastics.com/store-food-longterm.html and https://www.askaprepper.com/repackage-foods-mylar-bags-oxygen-absorbers-long-term-survival/)
I'm going conservative with a 5 year date. I think one could go 10 and the only problem would be a loss of some nutritive value. Since this stuff is all things we will use, my plan is to slowly cycle through it. Unless there is a quarantine, in which case we will cycle faster.