
In actuality, I’ve been working on this since the last post, but a lot of it has been in small parts that didn’t lend themselves to writing about. The ones that did, well, more on those later. I think I can write about them now without ranting. Maybe.
So, after getting the mast up, summer heat intruded. No way I was going to be up on the roof for any amount of time in 90+ degree weather, so that delayed things for a while. Two hurricanes didn’t help either. Plus the usual mow the grass, go camping, so on and so forth. The life of the retired gentleman. 🙂
 |
| 5/8″ pilot hole |
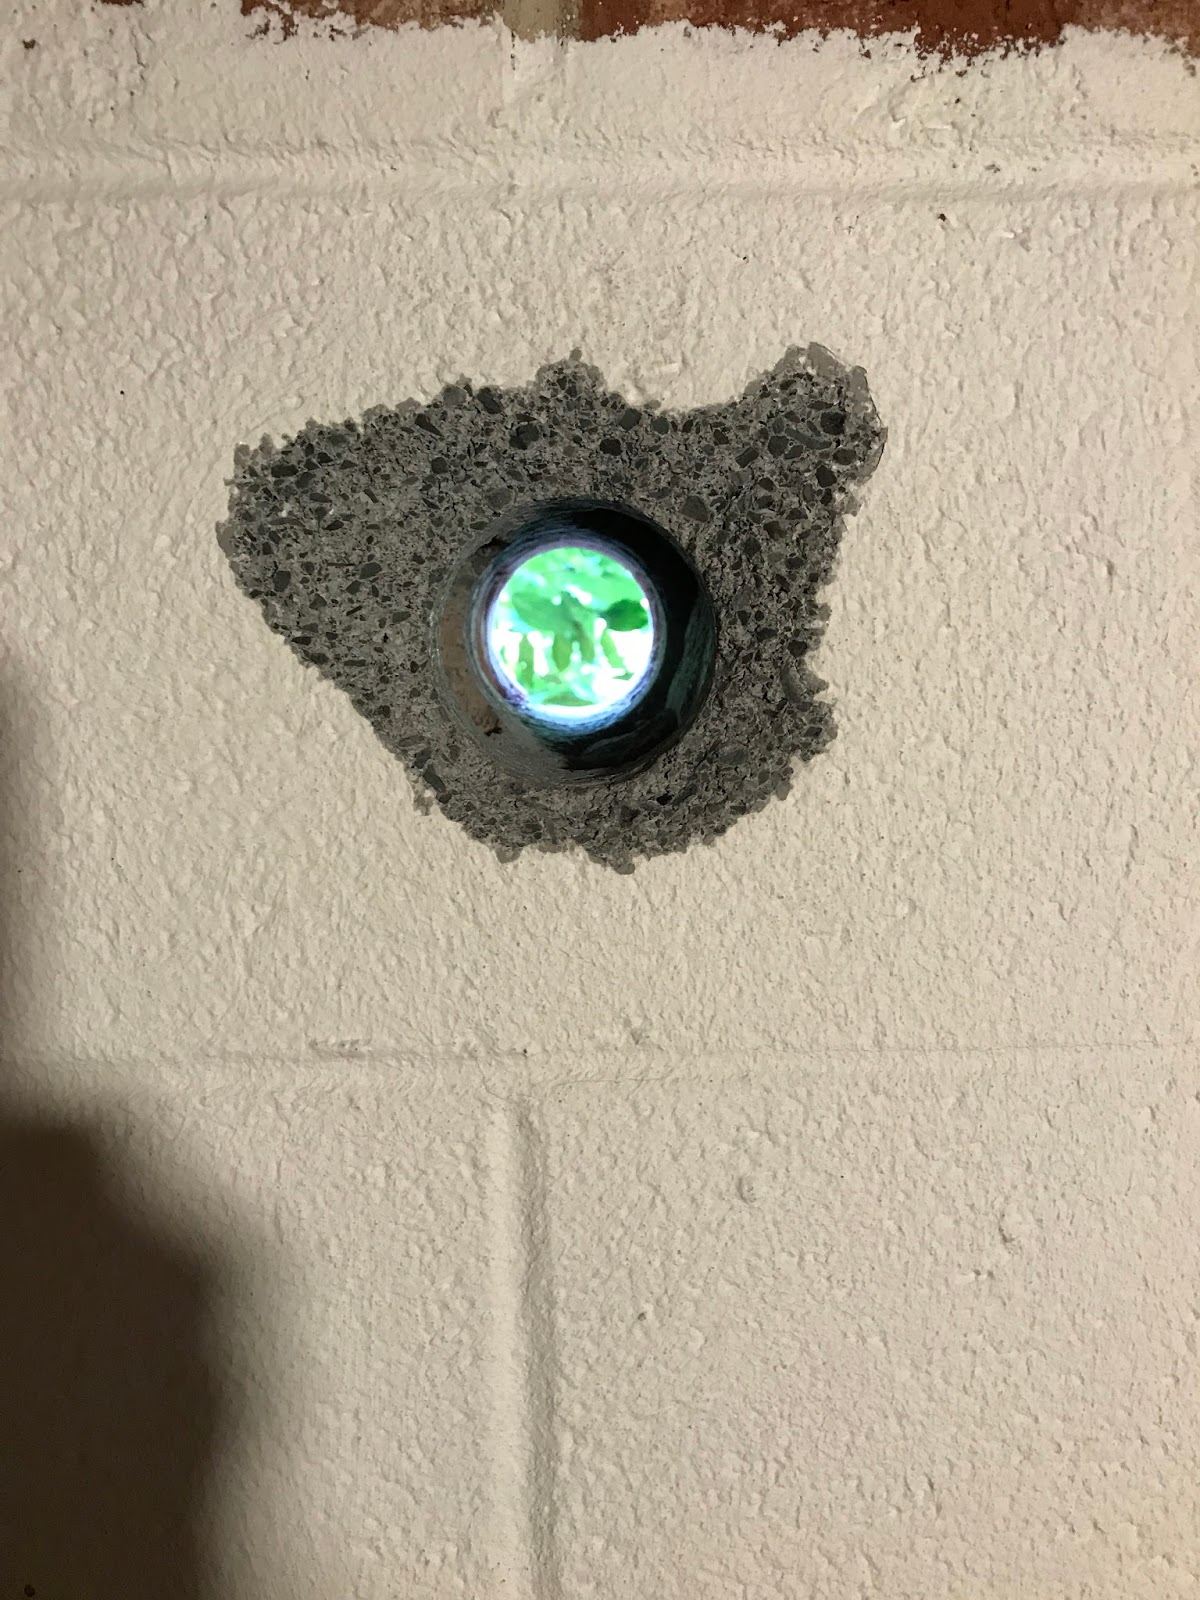 |
| 2 5/8″ finished hole;
note the blowout |
The first thing to be accomplished after the mast was to fabricate some sort of entrance facility for all the various antenna cabling. I wanted one not only for items on the mast, but for the coming wire antennas as well. This required some work, namely a 2 5/8″ hole core drilled through the basement wall. Once the location was selected and triple-checked for appropriateness, this was accomplished in two steps. First, a 5/8″ hole was drilled through the wall. This gives the larger bit’s pilot bit a path to follow and helps keep it straight. I picked this tip up from an electrician. Illustrative pictures on the left, click to get the super-sized versions.
On the 2 5/8 hole, you’ll see the blowout around the hole. This is what happens when the bit pushes through at the end of drilling a hole in masonry. I have yet to figure out how to stop it, only how to minimize it and patch it after the fact. This one is the best I’ve ever managed for a hole this size. To do this, you have to learn to feel when the bit is about ready to go through and then back off the pressure you’re exerting on the rotary hammer, allowing it to just barely drill through.
The reason for a 2 5/8 hole is so that the fitting end of a 2″ fitting would fit through. I’m using 2″ PVC Schedule 40 conduit, and normally you would make a 2 1/2″ hole, but I wanted this to fit snugly to the side of the house.
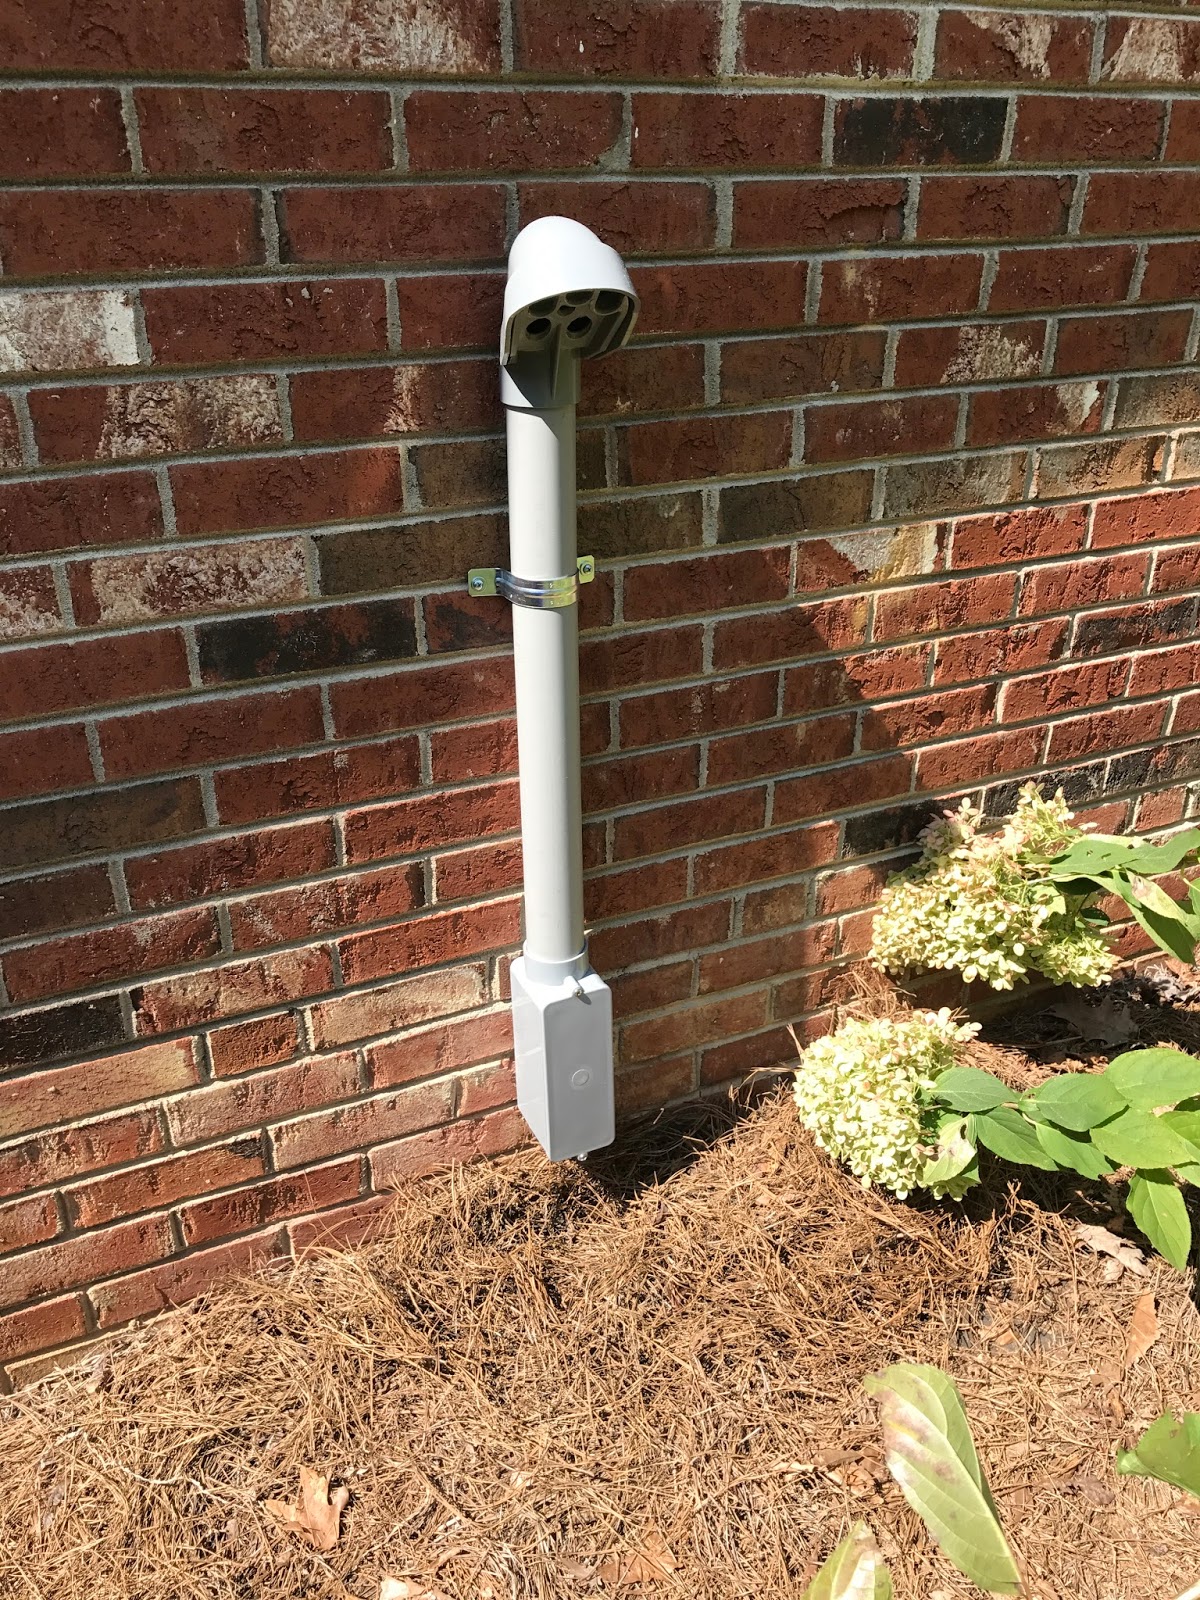 |
| Entrance Facility |
That’s a 2″ PVC weatherhead, the sort of thing you normally see for an incoming power line. I chose it using the logic that if it was good enough to handle power lines in a weatherproof fashion, it would be good enough for antenna lines. Obviously time will tell if my logic is correct.
The entire set up is around 40″ tall. That gets it up to a nice height to work at.
 |
| Antop UFO TV Antenna |
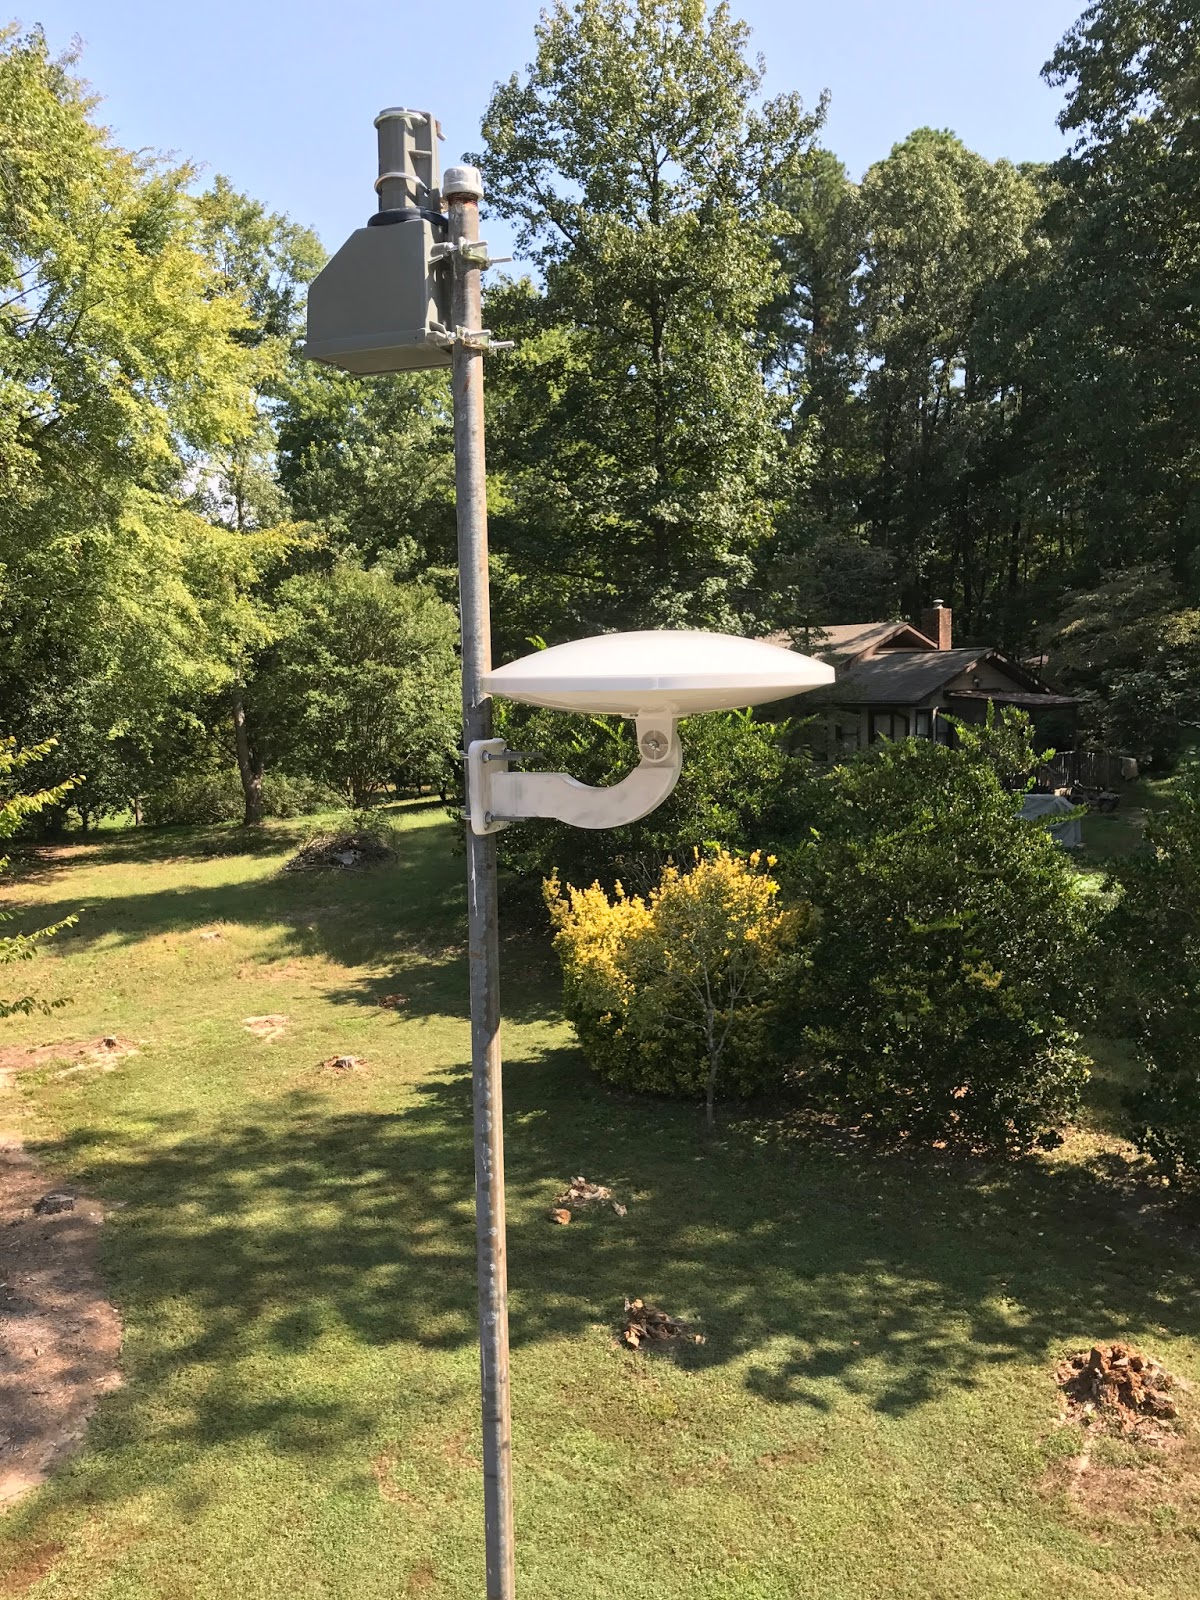
Next up was the first antenna. You may recall that we became “cord cutters” some time ago, ditching our over-priced and under-utilized cable TV for Amazon Prime, Netflix and Sling. I had promised Mrs. Freeholder, the Carolina Panthers fan, an antenna so she could watch her football games without my having to pay for them. Behold the TV antenna. Behold also the Channel Master rotor, which has nothing to do with the TV antenna. I’ll come back to it. The antenna is an Antop UFO Smartpass Amplified HDTV antenna, suitable for outdoor, attic or RV use. You can buy it on Amazon for $90. It’s lightweight, seems to be well-constructed within reason, and goes up easily. We’re in a good signal area, it’s 20′ or so above ground and we’re getting 50+ channels (with a lot of duplicates), some of those from 90-ish miles out. It’s simple to wire in. Mine goes to an 8-way powered CATV splitter that feeds the house cable distribution network. Yes, I’m a geek. My house has a CATV distribution network.
 The Channel Master rotor also came from Amazon, and it was for this. That is a Cushcraft A627013S 6M/2M/70cm Multi-Band Beam Antenna that I bought from DX Engineering. A better ham radio vendor than DX Engineering I don’t know of. A bigger piece of crap than the Cushcraft A627013S I’ve not seen lately.
I’ll keep the explanation simple, just to avoid a pages long rant. Mis-drilled, mis-aligned and missing element mounting holes in the beam. Missing parts. Elements cut shorter than spec. Inadequate instructions. A 24+ hour lag time on tech support questions. An element mounting system designed by a drunken first semester engineering student. Unbalanced weight-wise to the point of stressing the rotor; this last from an antenna designed to mount on standard TV mast and use a standard TV rotor.
Those are my big complaints. I won’t bother with the small stuff.
Credit where it is due, DX Engineering really stepped up and helped sort out a lot of this. What they couldn’t, MFJ did, although I got the vibe that they were doing so a bit grudgingly.
In the process of assembly, I had the antenna partially assembled and then disassembled 5 times as I found problems and corrected them. Once assembled, I had to partially disassemble it twice more on the roof to correct the weight distribution issues. Once finally mounted in the rotor, I spent several hours trying to true up the elements, getting the 70cm/2M elements as vertical as I could and the 6M elements horizontal. They’re close. The 6M side is giving me an SWR of 1.5 in the center of the SSB part of the band, which is what I tuned everything for. I don’t know about the 70cm/2M; I’m going to have to find a meter to borrow to test those.
Cushcraft is owned by MFJ, who gets no link love from me. If it is humanly possible, I will never buy another of their products. I’ve seen it said that when you buy one of their products you need to remember it’s more of a good starting point. If this is what was meant, I’m calling BS.
Here’s a picture of what I hope is the finished product, taken in the dying light of day yesterday.
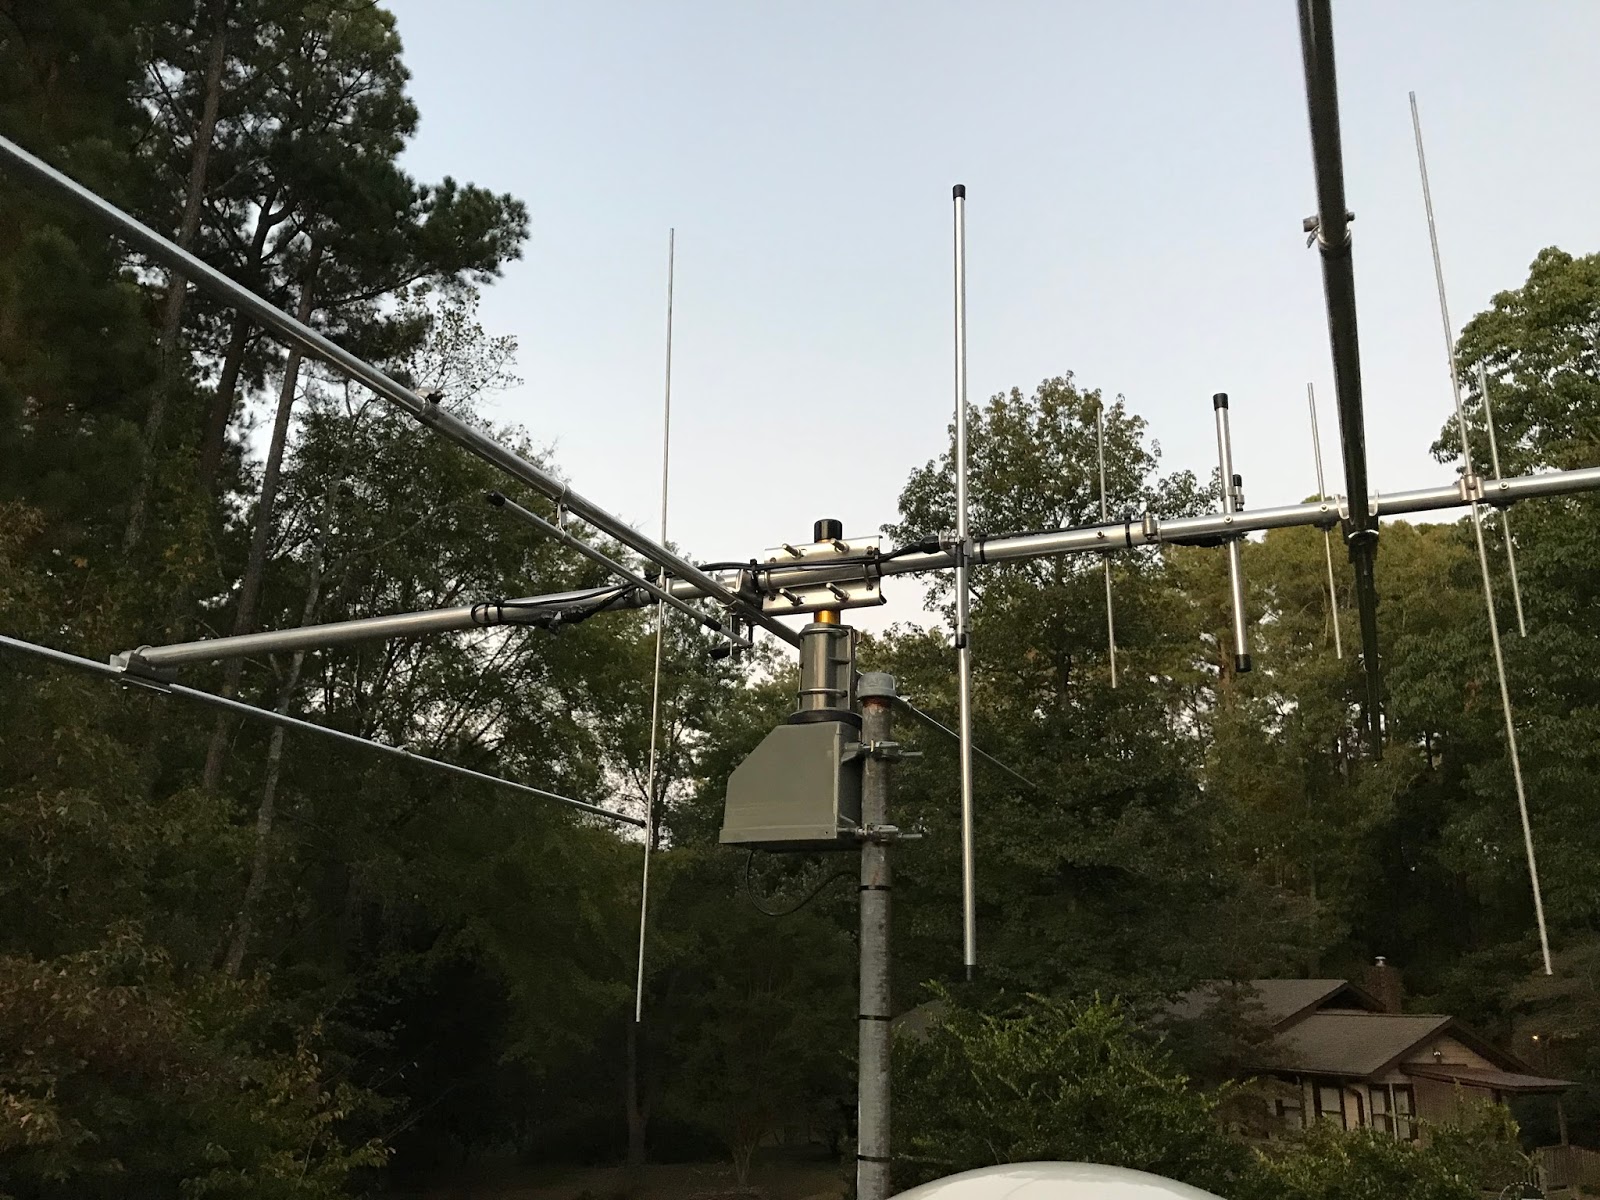 |
| Finally finished? |
As you can see, it’s still missing feed lines. I’m going to use DX Engineering’s LMR-400MAX line. I don’t run an amplifier, so I want to send as much power as power as possible to the antenna and not waste it in the feed line. Those are ordered, and my email informed me an hour or so ago that they have shipped. They’ll get installed next week, weather permitting.
After that, I’ll get on the air and see if I’ve managed to make a silk purse from a sow’s ear.